The contrast setting on your TV controls the difference between the darkest and brightest parts of the image. Adjusting the contrast can help improve the overall picture quality of your TV. In this guide, we’ll explore how to adjust the contrast on a TV, including the different types of TV technology and how to adjust the contrast settings.
Types of TV Technology
Before we get into adjusting the contrast on your TV, it’s important to understand the different types of TV technology available. The two most common types of TV technology are LED and OLED.
LED TVs use an LCD panel and an LED backlight to create the image. They are generally more affordable than OLED TVs and have a brighter picture, but they can sometimes have issues with black levels and contrast.
OLED TVs use organic compounds to create the image and do not require a backlight. This allows for better black levels and contrast, but they are generally more expensive than LED TVs.
Adjusting the Contrast on Your TV
Now that you understand the different types of TV technology let’s explore how to adjust the contrast on your TV.
Navigate to the Settings Menu
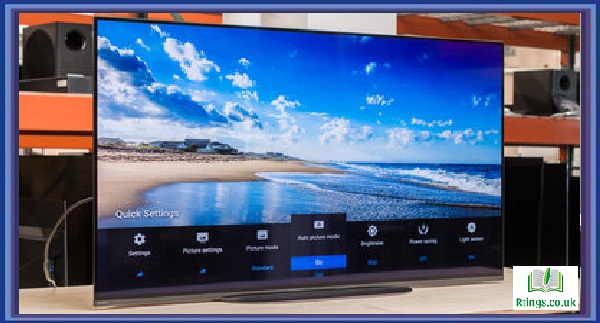
The first step to adjusting the contrast on your TV is to navigate to the settings menu. The settings menu can be accessed using your TV remote. Look for a button on your remote labeled “Menu” or “Settings.”
Find the Picture Settings
Once you’ve accessed the settings menu, look for the “Picture” or “Display” settings. This is where you’ll find the contrast setting.
Adjust the Contrast
Once you’ve found the picture settings, look for the “Contrast” option. The contrast setting may be labeled differently depending on your TV manufacturer, but it’s usually under the “Advanced” or “Expert” picture settings.
Use your remote to increase or decrease the contrast level to adjust the contrast. You’ll want to find a balance between the picture’s brightness and the shadows’ darkness. Remember that increasing the contrast too much can result in a loss of detail in the bright and dark areas of the image.
Save Your Settings
Once you’ve adjusted the contrast to your desired level, save your settings. This will ensure that your changes are applied to all of your TV’s inputs.
Tips for Adjusting the Contrast
Here are some additional tips to keep in mind when adjusting the contrast on your TV:
- Use a test pattern or calibration disc to help you adjust the contrast accurately.
- Keep the contrast high, as this can result in a loss of detail in the brightest and darkest parts of the image.
- Adjust the brightness and contrast settings to achieve the best overall picture quality.
- Consider adjusting the contrast based on the lighting conditions in the room where your TV is located. You may want to decrease the contrast in a dark room, while in a bright room, you may want to increase it.
Conclusion
Adjusting the contrast on your TV can help improve the overall picture quality of your TV. By understanding the different types of TV technology and following the steps outlined in this guide, you can adjust the contrast settings on your TV to your desired level. Remember to use a test pattern or calibration disc for accuracy and to find a balance between brightness and darkness for the best overall picture quality.
Frequently Asked Questions (FAQs)
How do I know if I’ve adjusted the contrast on my TV correctly?
Adjusting the contrast on your TV can be a subjective process, as it depends on your preferences and the lighting conditions in your room. However, there are a few things you can look for to ensure that you’ve adjusted the contrast correctly.
First, check for any loss of detail in the brightest or darkest parts of the image. If you’ve set the contrast too high, you may notice that more information in the highlights or shadows needs to be recovered. Conversely, if you’ve selected the contrast too low, the image may appear dull or lacking in contrast.
Next, look for overall brightness and color accuracy. You may need to adjust the contrast if the image appears too bright or washed out. You may need to change the contrast if the colors appear dull or muted.
Finally, consider the lighting conditions in your room. If you’re watching TV in a dark room, lower the contrast to avoid eye strain. If you’re watching TV in a bright room, set the contrast higher to compensate for the ambient light.
Ultimately, the best way to know if you’ve adjusted the contrast on your TV correctly is to trust your eyes and experiment with different settings until you find a balance that works for you.
Can adjusting the contrast on my TV damage the TV?
No, adjusting the contrast on your TV should not damage the TV. However, it’s important to note that setting the contrast too high can result in a loss of detail in the brightest and darkest parts of the image, which can affect the overall picture quality. It’s recommended to adjust the contrast to a level that balances brightness and darkness while preserving the details in the highlights and shadows. Additionally, using a test pattern or calibration disc is a good idea to ensure that you’re adjusting the contrast accurately and effectively.
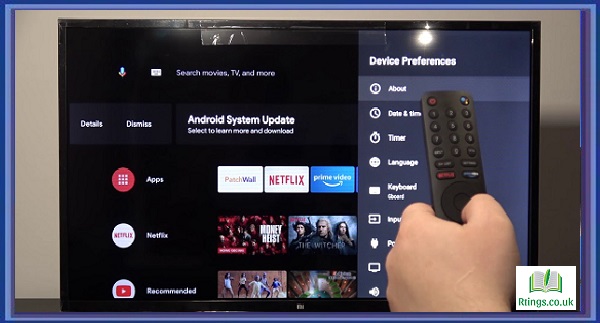
How do I adjust the contrast on my TV if I don’t have a remote control?
If you don’t have a remote control, you can still adjust the contrast on your TV by accessing the on-screen menu. Most TVs have buttons on the front or side of the unit, allowing you to access the menu and navigate the settings. Look for a button labeled “Menu” or an icon resembling a square with horizontal lines, typically the menu button. Once you’ve accessed the menu, look for a setting labeled “Contrast” or “Picture,” which allows you to adjust the contrast using the buttons on the TV itself. Remember that the process may be slightly different depending on the make and model of your TV, so refer to the user manual for specific instructions.